May 8, 2013
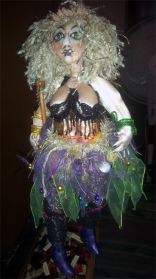 Floppy Flo is finally finished. She is on her pole and looking good. I added bling to her skirt using both pre-made trim I got at Joann Fabric and ponytail holders I got from Dollar General. They are the type of elastics that have fancy lace and jewels that hang off of it. They look like a fairy skirts when used on a doll. I then her some thigh stockings complete with holes and a garter belt. The fun thing about getting to this stage of the doll is now you can play. You can make jewelry, fancy skirts, flowers in the hair, whatever you think your doll needs or is telling you she needs. It sounds strange, but once you start making dolls you will find they talk to you, they let you know what they want to wear or the type of person she wants to be.
I don’t mean in a loud voice like someone is talking to you, but you get this feeling from doll as to what would look best or work well with your doll. You may have started making a sweet little country girl and end up with a sexy singer, you just never know. I don’t know how many patterns I have started working on and was going to try to make it like the picture, but she had other plans of what she wanted to be. When this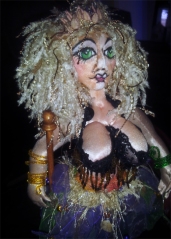 happens just go with it. You can end up with some of the nicest surprises.
Be sure to keep c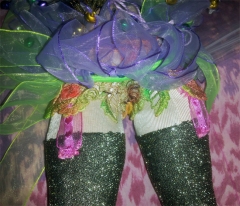 hecking back and see what my next project is. I would like to make an older, heavier stripper to show what Flo is going to look like in a few years. Till next time…
Posted in Uncategorized | Tagged cloth doll, cloth doll making, doll making, floppy flo, hearing voices, repurpose supplies, stripper, stripper doll | Leave a Comment »
May 6, 2013
Posted in Uncategorized | Tagged creativity, dancing dolls, doll base, doll making, doll stand, Doll stands, OOAK, sexy, stripper doll, stripper pole, wood base | Leave a Comment »
April 20, 2013
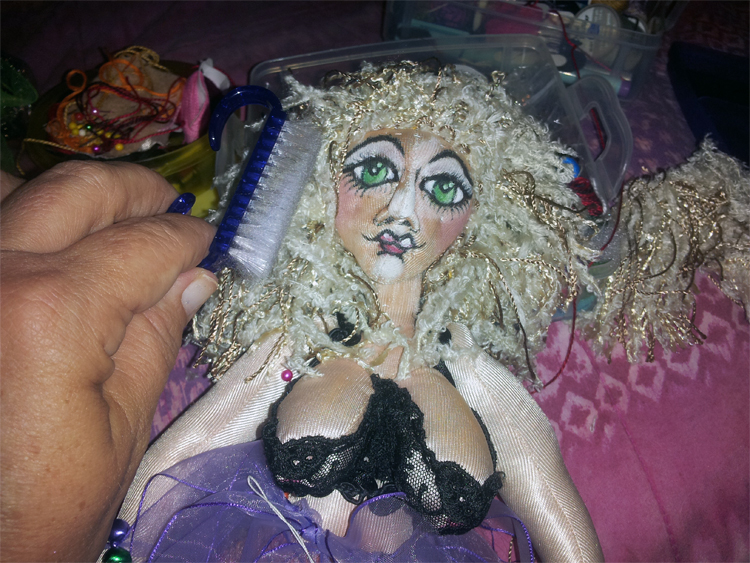
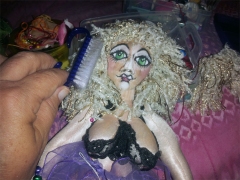 Flo is starting to come together. She now has hair. I like using different types of materials to make doll hair. Her hair was made by using a yarn-type trim I found in the upholstery section of my local fabric store. I then cut it into strips that were the length of the circumference of half the scalp. I then pinned each strip in place and then sewed it in. I then took the next strip and fit it down the scalp a little further and continued this until the entire head was full of hair. I used a thicker embroidery thread to sew the hair in. It was a contrasting color that blended in well, but also added some extra color to the hair. I then used a small nail brush and brushed the yarn until all the sew lines were covered and the hair had
 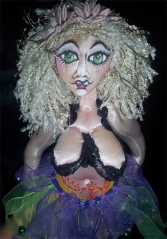 a more
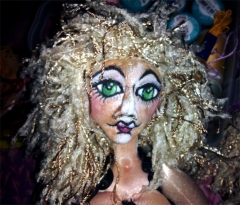 wild look. The great thing about doll making is that you can use all different types of fabrics, yarns, etc. to make hair, clothing, embellishments, etc. so let your imagination go wild. You will find the longer you make dolls the more you will see items in your everyday world differently. I love to go to the hobby stores after major holidays and see what type of items I can get for next to nothing and turn into doll stands, doll embellishing, or even dolls. The fun of doll making is you can turn anything into a doll, simple or exquisite, your choice… till next time….
Posted in Uncategorized | Tagged doll making, dolls, embellishing, fabric store, floppy flo, hair, hair styling, OOAK, unusual materials | Leave a Comment »
April 18, 2013
Tod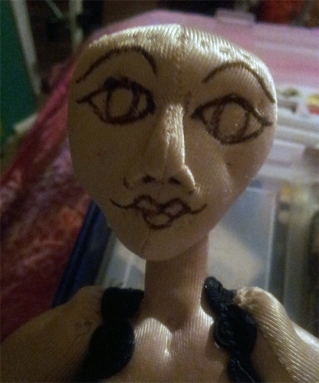 ay is Flo’s lucky day she now has a face. The pictures show my progression from the simple outline to her finished, full make up face. Of course now she needs hair, but that is for another post. The simple explanation on how I make faces is as follows:
I first do any needle sculpture that is required or if she is a flat face then that is not needed. I then put dots in the specific areas of the edges of the eyes, nose holes, sides of the mouth and then draw a line for the eyebrows so I can see where everything is. You can do this with a pencil or air erase pen or  whatever marking tool you like. If you are rather confident in your ability you could then just use a micro pen and do the lines on the face like you see in the picture. I then paint in any areas that need to be white such as the whites of the eyes, any highlight on the nose, etc. I like to then once everything is dry color in the eyes. I decide if I want her to have green, blue, brown or whatever color eyes and finish those.
I then like to do all the coloring and shading of the face. I normally use colored pencils, regular face makeup, gel pens, whatever I like to use for the type of look I am wanting. The more dramatic the more opaque the medium I use. Some people love to use water color pencils, but I have issues with those running. You can also use acrylics, as they are fast drying and you can keep layering them. Just experiment with what every you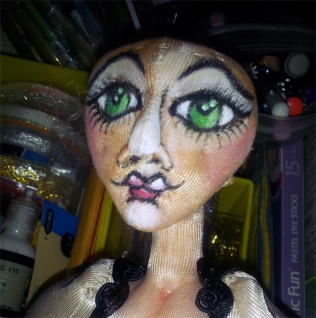 have and see what you like. I learned by making face circles on fabric and just painting faces until I was comfortable enough to move to the finished doll head. Remember, there are no mistakes, just opportunities to try something different.
Once I have all the coloring in the way I like it, from the shading, to the facial blush, the eye makeup, etc., I then start outlining and adding the finishing touches. I will darken the nose holes, outline the eyes, but in the pupil, put the white highlights on the eye, put eyelashes and define the eyebrows.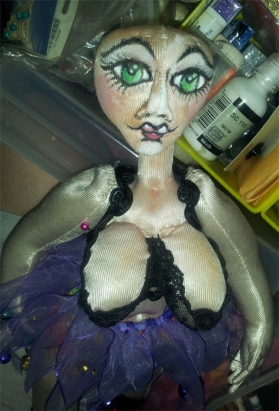 I then will take my shading pencils or makeup and highlight the body itself, running the blush brush over the joints, belly button, etc. Even if she has full clothes, I still highlight all parts of the body just so if she ever gets a change of clothes she looks good.
This was the short version on how to do faces, but watch for the announcement of when I have published my series on doll making, which will be posted here and available through Kindle and my Etsy store. Till next time….
Posted in Uncategorized | Tagged cloth doll making, dancer doll, doll making lesson, face painting, floppy flo, lady stripper, painting leson, stripper doll | Leave a Comment »
April 9, 2013
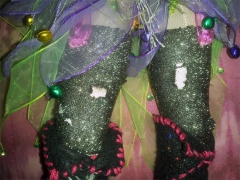
Today we are going to give Floppy Flo some shoes, well thigh high boots. The process really is rather easy. The heel is already built into the doll f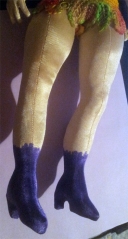 oot as part of the pattern. I have folded chenille sticks in the heel for strength. I then used my permanent, waterproof marker and colored in the foot and just above the ankle. I didn’t do the whole leg as I was going to glue felt over most of the leg, I then took my fabric glue, which I prefer Beacon’s 3 in 1 that you can get at any good hobby store. It goes on thick and dries fast. It also doesn’t expand or cause issues with the fabric. I then wrapped the felt around the leg and cut the excess at the ankle so I didn’t have a lot of extra fabric to deal with. Normally if you don’t like to glue then cut you can take the leg pattern of your doll and
 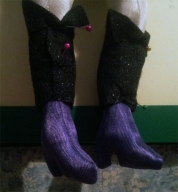 use that as a template for your boot top making sure you leave some allowance for the seam lines. You can use whatever type of material you want for the boots. I have used leather, fake leather, suede, fabric, vinyl, felt, whatever matched the outfit. Just so it can be glued and then thin enough to stitch through, as you are going to sew the laces down the front of the boot to give it more character.
For the laces you can use a matching thread, thin or thick thread, or a contrasting thread, it is up to you and the look you are wanting to get. I like using a contrast color that matches the rest of the costume so I can use it as an accent, but that is my thing. When you make your own doll you can make the boots any color you like, out of any fabric you want, and use any thread type you think will work. I haven’t tried a metallic thread, as I find they stretch too much for me, but they would make a co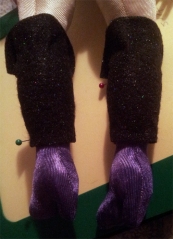 ol accent on your boots. You can also just make ankle high shoes. Instead of gluing anything to the leg just take your pen or paint and color the show up to where you want it to stop. You could paint a set of pumps, baby dolls, sew toes on the foot a
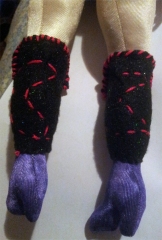 nd make a heeled sandal, it is completely up to you. If you use a doll pattern that does not have the heel built-in then you could make flats, flat boots, sandals of any type, or make a pair of stripper heels as tall as you would like b
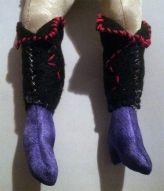 y using Fimo or some other type of clay and then attaching fabric to the clay heel, but that is for another post or book, as there are so many options I do not have room to even explain them all here.
Next I am either going to do Floppy Flo’s face or hair, not sure which, but I normally paint the face before the hair, as that keeps me from having to worry about getting paint on the hair, plus it gives me a bigger palate to work from, as I normally like to sew the hair down around the face so you don’t have those big blank areas on the head where hair should be, but has moved over and now looks funny. Hope you are enjoying our journey with Flo and till next time…
Posted in Uncategorized | Tagged cloth dolls, doll making, fabric art, floppy flo, make shoes, making boots, one of a kind dolls, painting, Sewing, stripper boots, types of fabric | Leave a Comment »
April 4, 2013
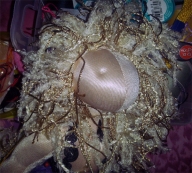
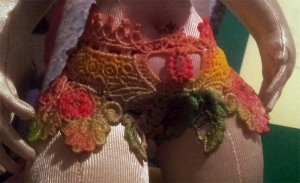 All good strippers need a nice pair of undies, even though they won’t be staying on very long. In trying to decide what to use for Flo’s underwear I pulled out a couple of my lace bins and started digging. I found two very pretty pieces of lace that I had hand dyed bright colors and decided they would make the perfect addition to her costume. I then took these pieces and hand sewed them in place. I then had to decide what I was going to do with her floppy parts. This was a hard decision, as they are long and many of the pieces of fabrics I used just didn’t look right so I finally found a large piece of lace fabric and cut out pieces the size I needed and began making Flo a bra by hand sewing the pieces directly on her breasts. If she was a real person this would never work, but since she is cloth, and I have no intention of taking the costume off, it was easier to just sew the fabric directly to her body. What this did prove is
 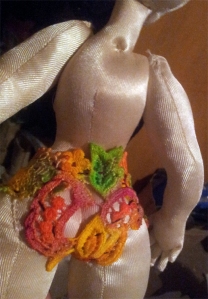 a good bra really does put the “girls” where they belong, as Floppy Flo isn’t as floppy as she was before the new bra. She is still pretty floppy though. I am liking the way the underwear is looking, but I want to make sure that the rest of her costume enhances what is already there and not overpower it or cover it up.
The fun of working with cloth dolls is you have the option of being able to sew directly to the body or make the clothes removable. You know that box or bag of little fabric scraps you 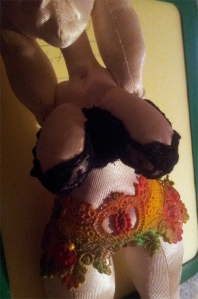 don’t know what to do with? Use them in making your costumes for your dolls. Most sewing projects take rather large pieces of fabric, but when you are working with a little 14″ doll or smaller you don’t need much fabric. Also, after certain times of the year such as Halloween your local fabric store puts those fancy fabrics on 80 to 90 percent off and most people have no idea what to do with, well make a fancy doll with them. You can make dancers, evening gowns, whatever, and you aren’t spending a lot of money either.
This is why I so love working with fabric, if you use coupons, look in the bargain bin, or check out fabrics that are holiday themed and you are now past that holiday, you can get some remarkable deals and have more fabric to play with. I don’t know how many times I have gone to Joann Fabric the week after Halloween or when they are having 50% off the already discounted bargain bin and bought half a yard of 10 different fabrics and everyone asks what I am going to do with all that different fabric. I get to tell them I am a doll artist and I just like the fabric and it is going in my bin for the next doll I am working on. Even if you don’t make dolls, that fabric is great for wall hangings, art quilts, purses, or whatever type of fabric art you are into. I really love the look of crazy quilts and those are great for using small pieces of weird or fancy fabric, as you can tie it all together with embroidery, trims, or whatever you please.
Next time we are going to see what Floppy Flo gets to wear on her feet. I am thinking thigh high boots are in order, as what stripper doesn’t look good in a fancy pair of boots? Till next time…
Posted in Uncategorized | Tagged artwork, cloth dolls, crafts, crazy quilts, discount fabric, fabric art, fancy fabric, fiber artist, floppy flo, quilts, scraps, stripper, stripper clothing | Leave a Comment »
April 2, 2013
I know it has been a while since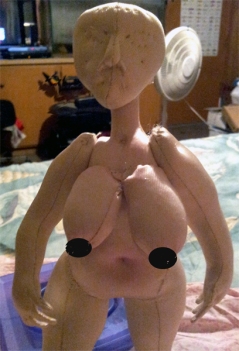 I have posted to this blog. Sassythreadworks.com is still around and kicking, albeit not very well currently. Business has been slow, but still doing custom embroidery work and designing fiber art items such as dolls, purses, and other fun things. I am currently working on a couple of Kindle books and am going to start posting this week the progress of my new doll “Floppy Flo.” She is my middle-aged stripper who is a little too big in a lot of areas, but still loves to dance. The inspiration for this doll came from a TV show I was watching that is based in Atlanta, Georgia. There is a bar called the Clermont Lounge and is known for being the place where old strippers go to still be able to work. I mean these ladies are really something else. They have a good time and just let it all hang out, if you get my drift. Since I am a big girl myself and am overly well endowed, I just had to make a doll that was showing the affects of age and gravity, which is something that isn’t very nice to the “girls
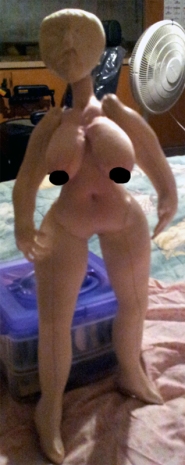 .”
.”
The pattern for the doll is based of the Plus Size Body Basic by Mary Tressler (www.uncommonfolk.org), but then I made a few adjustments and came up with an add-on gusset for the breast area. This took a lot of experimenting, as the “girls” just did not look real enough for me so had to keep trying sew-on pieces, pieces that are incorporated into the sewing, and such. I think I finally found a method that works and you will get to see how she progresses on my blog. I think you will find her transformation quite interesting and I will be posting again to my blog, so a win-win situation…
I do have to admit though that making a doll that is well endowed is not the easiest thing to do. You either end up with these weird looking attachments to the chest or something that looks like balloons that are sewed on or some other catastrophe that doesn’t look like a set of “girls” but as a deformity on the poor girl’s chest. The next issue comes in when you start trying to costume the doll, which I will be showing you how that works in other blog posts. I just wanted to concentrate today on how the doll came to life and that if there is a vision you have for a doll that you just need to get it on paper and get ready to sew several prototypes, but you will end up with a doll you really like. If you have a doll pattern that you really like don’t feel bad about taking that pattern and tweaking it to fit what you are wanting to do. You know, why reinvent the wheel? Just make sure when you go showing people your doll or submitting it to contests or such that you acknowledge that the base pattern was made by so and so and the modifications were made by you. Unless you take a pen and piece of paper and completely draw that doll up by yourself, then it isn’t your pattern, so give credit where credit is due. It is just the right thing to do.
I hope that watching my blog over the next few weeks will help you get in the mood to start creating your own “Floppy Flo” or whatever craft you are into. I just love fabric though, as I can paint it, cut it, sew it, glue it, layer it, you name it, and it is a very forgiving medium to use, especially since if you don’t like the way something has sewn together you can just take out the seam ripper and start over again. Not many other mediums allow for that… Till next time… keep creating!!
Posted in Uncategorized | Tagged age and gravity, creativity, fabric art, fabric dolls, mary tressler, michelle lord, one of a kind, original pattern, sassythreadworks, the girls, well endowed | Leave a Comment »
August 28, 2012
This past few months have been both slow and crazy… I am still around and working on dolls, purses, and commercial embroidery for clients. The above pictures are of a purse I just finished for a friend. She provided the fabric…I designed the pattern. I plan on posting more in the next few weeks, as I have several projects I am working on and want to share them with you. Till next time….
Posted in Uncategorized | Tagged cloth dolls, embroidery, fiber art, handbags, machine embroidery, purses, sassythreadworks, totes | Leave a Comment »
February 11, 2012
My latest doll is based on the fictional character featured in the Laurell K. Hamilton series that features Anita Blake, vampire hunter/zombie animator, who is known for being very well armed. The problem is have you every tried to find weapons that are 1/3 scale? It is very hard to do. I thought a few years ago you could find all types of toy guns, but I guess toy companies are now scared of them since kids were getting shot by police who thought they were carrying real guns. Problem is I really am not wanting to make my own out of clay, but guess I am not going to have much choice. I don’t mind making her knives and swords, but making a 9mm pistol and a pump action shotgun just doesn’t seem like a very easy thing to do, but we shall see. So, here is my vision for Anita, without her weapons. She is getting close to being done and I really am enjoying making her. Till next time…
Posted in Uncategorized | Tagged Anita Blake, art doll, fiber art, fictional character, guns, knives, OOAK, toy scale weapons, weapons | Leave a Comment »